Virtual Distributed Switches have many advantages over standard switches. Because you have a centralized configuration over all hosts they’re less error prone to configuration errors than standard switches. Call me old fashioned but I prefer to have at least the hosts management interface on a standard switch. In case something bad happens, you can still access the host and make changes on the interface.
Recently a customers host had failed. After restoring configuration, for some reason vmnics were swapped between vdSwitches and it wasn’t possible to configure that host neither with hostclient nor with vCenter. The customer was short on vmnics in the past and has configured Management Network on a distributed Portgroup on a distributed vSwitch. This is legal and usually not a problem. In that special case it was a problem. I was literally locked out of the host. Reassigning NICs in the DCUI didn’t work, because they were all claimed by Distributed-vSwitches thus not available for standard switches.
What now ?
There’s help, but you need to access the CLI of DCUI.
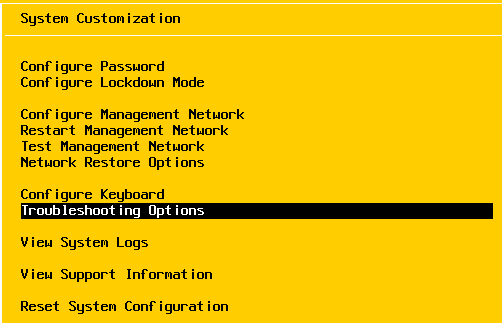
Login to DCUI console, select “Troubleshooting Options” in the main menu.


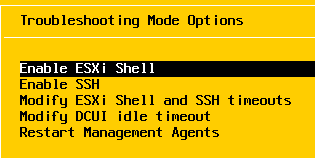
In Troubleshooting section select “Enable ESXi Shell”.


On the right hand side you can see the current status of the ESXi Shell.


Press [Alt] + [F1] to access the shell and login as user root.
Add new Standard Switch
Add a standard vswitch with name vSwitch1 (or any other non-existing name).
esxcli network vswitch standard add -v vSwitch1
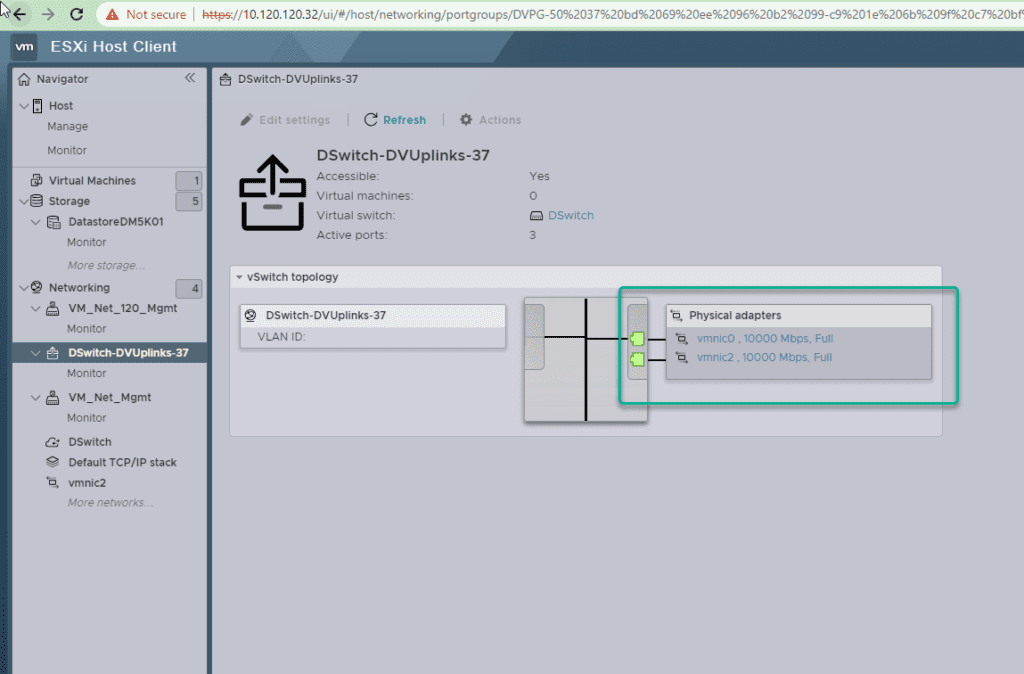
Now, let’s have a look at our distributed vSwitches. We need to unclaim a vmnic from the dvSwitch to use it with the new standard switch vSwitch1.
esxcli network vswitch dvs vmware list
[root@localhost:~] esxcli network vswitch dvs vmware list
DSwitch
   Name: DSwitch
   VDS ID: 50 37 bd 69 ee 96 b2 99-c9 1e 6b 9f c7 bf cb 14
   Class: cswitch
   Num Ports: 9216
   Used Ports: 6
   Configured Ports: 512
   MTU: 9000
   CDP Status: listen
   Beacon Timeout: -1
   Uplinks: vmnic0, vmnic2
   VMware Branded: true
   DVPort:
         Client: vmnic0
         DVPortgroup ID: dvportgroup-38
         In Use: true
         Port ID: 16

         Client:
         DVPortgroup ID: dvportgroup-38
         In Use: false
         Port ID: 17

         Client: vmnic2
         DVPortgroup ID: dvportgroup-38
         In Use: true
         Port ID: 18

         Client:
         DVPortgroup ID: dvportgroup-38
         In Use: false
         Port ID: 19

         Client: vmk0
         DVPortgroup ID: dvportgroup-39
         In Use: true
         Port ID: 3
[root@localhost:~]
You’ll get a long list with switch details, ports and connected clients. Look for the line “Uplinks:”. There you’ll see all vmnics used as uplinks on that dvSwitch.
Drop vmnic from vDS
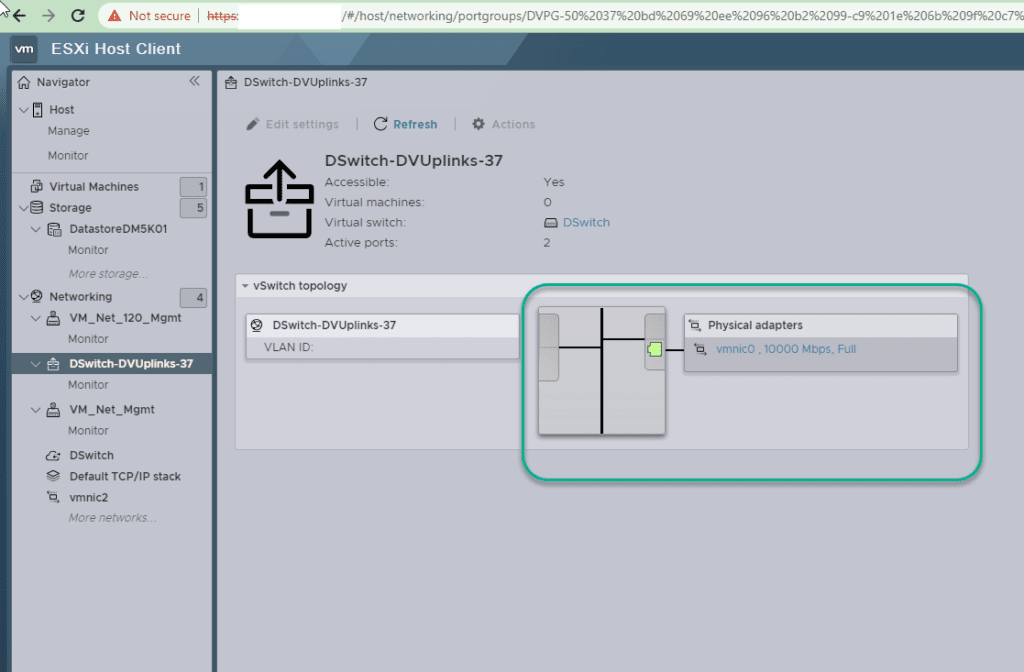
Select a vmnic to drop from the vdSwitch.
To get a list and note down the port ID and switch name
esxcli network vswitch dvs vmware list


[root@localhost:~] esxcli network vswitch dvs vmware list
DSwitch
   Name: dvs-LAN-1
   VDS ID: 50 37 bd 69 ee 96 b2 99-c9 1e 6b 9f c7 bf cb 14
   Class: cswitch
   Num Ports: 9216
   Used Ports: 6
   Configured Ports: 512
   MTU: 9000
   CDP Status: listen
   Beacon Timeout: -1
   Uplinks: vmnic0, vmnic2
   VMware Branded: true
   DVPort:
         Client: vmnic0
         DVPortgroup ID: dvportgroup-38
         In Use: true
         Port ID: 16

         Client:
         DVPortgroup ID: dvportgroup-38
         In Use: false
         Port ID: 17

         Client: vmnic2
         DVPortgroup ID: dvportgroup-38
         In Use: true
         Port ID: 18

         Client:
         DVPortgroup ID: dvportgroup-38
         In Use: false
         Port ID: 19

         Client: vmk0
         DVPortgroup ID: dvportgroup-39
         In Use: true
         Port ID: 3
[root@localhost:~]
In our example vmnic0 and vmnic1 are connected to the distributed vswitch. Port ID of vmnic2 is 18 and name of the dvSwitch is dvs-LAN-1.
esxcfg-vswitch -Q <vmnic> -V <uplink port ID> <dvS-name>
In our example the command would be:
esxcfg-vswitch -Q vmnic2 -V 18 dvs-LAN-1
[root@localhost:~] esxcli network vswitch dvs vmware list
DSwitch
   Name: dvs-LAN-1
   VDS ID: 50 37 bd 69 ee 96 b2 99-c9 1e 6b 9f c7 bf cb 14
   Class: cswitch
   Num Ports: 9216
   Used Ports: 4
   Configured Ports: 512
   MTU: 9000
   CDP Status: listen
   Beacon Timeout: -1
   Uplinks: vmnic0
   VMware Branded: true
   DVPort:
         Client: vmnic0
         DVPortgroup ID: dvportgroup-38
         In Use: true
         Port ID: 16

         Client:
         DVPortgroup ID: dvportgroup-38
         In Use: false
         Port ID: 17

         Client:
         DVPortgroup ID: dvportgroup-38
         In Use: false
         Port ID: 18

         Client:
         DVPortgroup ID: dvportgroup-38
         In Use: false
         Port ID: 19

         Client: vmk0
         DVPortgroup ID: dvportgroup-39
         In Use: true
         Port ID: 3
[root@localhost:~]
An alternate (modern) command is vicfg-vswitch (vSphere4 and later):
vicfg-vswitch -Q <vmnic> --dvp <uplink port ID> <dvswitch_name>
It is recommended to use the vicfg-vswitch command instead of esxcfg, which will become obsolte in the future.
vicfg-vswitch -Q vmnic0 --dvp 18 dvs-LAN-1


Add vmnic to standard switch
esxcli network vswitch standard uplink add --uplink-name=vmnic0 --vswitch-name=vSwitch1
Now you have standard switch with one uplink (vmnic0). You may now configure that NIC for management in the DCUI.
Logout from ESXI Shell and switch view to DCUI with [Alt] + [F2]. Select “Disable ESXi Shell”.
Revert Settings
To remove a vmnic from a standard switch, issue this command.
esxcli network vswitch standard uplink remove –uplink-name=vmnic0 –vswitch-name=vSwitch1
Add vmnic0 back to distributed vSwitch dvs-LAN-1. We need to find an unclaimed port ID for vmnic0. I chose 39 in the example below.
esxcfg-vswitch -P vmnic0 -V 39 dvSwitch1
List all standard vSwitches.
esxcli network vswitch standard list
You’ll get a list of all standard switches. The vSwitch created in the beginning (vSwitch1) should be listed here too, but the line “Uplinks:” should be empty, because we’ve removed vmnic0.
Remove standard switch
To remove our empty vSwitch1 we can issue this command:
esxcli network vswitch standard remove -v vSwitch1